Showing posts with label MK techniques. Show all posts

Tuesday, April 30, 2024

Some works in progress, and experimenting with twisting stitches

tunisian cables

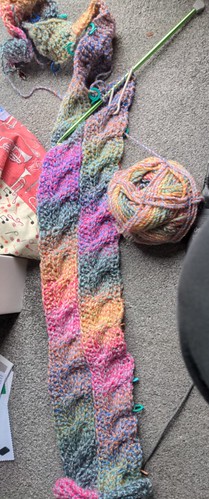
My current obsession, the tunisian cable scarf "San Marino" - I'm now on strip three of three, so it's even further ahead than this!
PXL_20240430_084924182

PXL_20240430_141803899

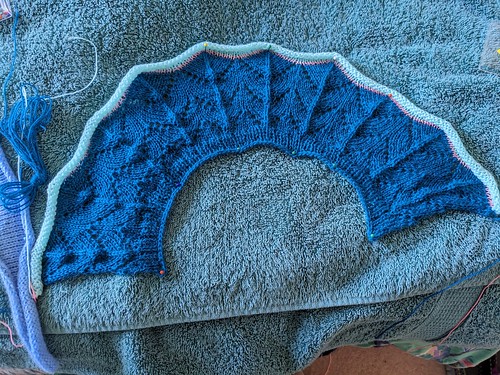
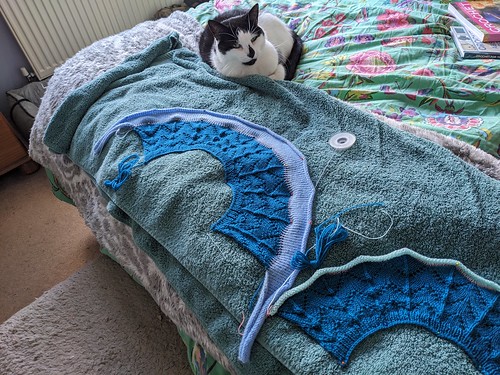
I thought I'd have a go at the Irene Woods / Clearwater Knits lace yoked top. The two yokes took the best part of saturday afternoon to knit on the machine (the transfers are hand-manipulated), and spent yesterday blocking on the bed, alongside my little helper. To be fair, the grey and white blanket is "his" domain, so he's being very good not putting cat hair on my work. Next stop is joining the yokes and knitting the sleeves downwards... 
PXL_20240414_100737242

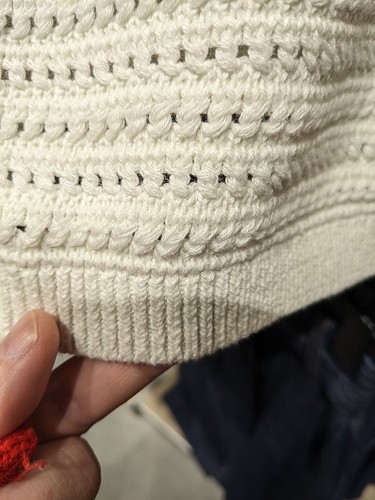
Some inspiration from M and S, I thought I'd try and replicate it by adding the ribber for one row to get very loose stitches. I don't think I'd want to do it all over though, this was a short-sleeved top or vest I think!
MandS lace

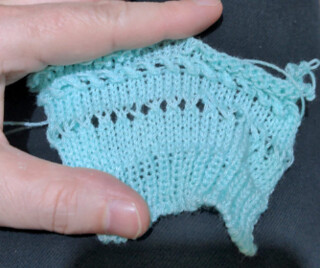
My attempt - first loose row, everything was just twisted 180 degrees using the 2 prong tool. On the second loose row, I turned the pairs 360 degrees, looks much more like it! I only wish I'd knitted a bit more and casted it off properly.

Does anyone else take random snaps of knitwear when out shopping, or is it just me?!

Current mood: busy

Saturday, April 20, 2024

Some useful MK edgings

I found these written up on a scrap of paper, I suspect someone presented these at Metropolitan Dream Week but I've no idea now who it was, so apologies if anyone wants to claim copyright on them (though I'm not sure you can copyright a technique anyway). The first three are joined as you knit. 

Cable edging (start at RHS of bed if right-handed):

Use 3 prong tool to hang edge of item, RS facing away from you, knit 4 rows. Use 3 prong tool to hang next 3 along edge, K4 rows. *Place end 3sts on RHS onto 3 rem. sts (ie move them left), use 3 prong tool to hang next 3 along edge, K4 rows. Repeat from * to end. Remember to work extra rows if turning a corner. If you run out of bed, use the three prong tool to remove the work and rehang on the RHS to continue. Cast off, steam. 

34c8283d-bf04-4d74-8dfa-03ce7bc74096

Cable join:

Cast on 4 sts, K2 rows. RC000. Hang edge of first piece using single prong transfer tool on the opposite side from the carriage, WS facing you, K1 row. Hang edge of second piece at the other end, K1 row. Repeat until RC010. Work cable over the 4sts (2 over 2), hang next edge, repeat. Cable is worked every 10 rows. You could experiment by casting on more stitches and still working the cable in the middle (perhaps leaving a needle out of work each side of the central 4 to make the cable stand out more). 

46c3cd64-eb7c-4e83-bced-f144119cbfdb

Simple lace edge:

CO 5sts. * Using 3 prong tool, move centre 3 sts to left by 1 needle, leave empty needle in work. Hang edge, WS facing you. K2 rows. Repeat from *. Cast off, steam flat. Could be useful if the item needs drawing up afterwards eg the top of a bag. 

40167ff4-9683-4c5d-8331-1d47306d1944

Pie crust edging: 

Poke 3 prong tool through edge of knitting, knit 6 rows. * Poke 3 prong tool into next area, hang onto same needles, k6 rows. Repeat from * to end

7db588ff-fbf7-41a9-bc72-19ae24b66ac8

Ruffle (to be sewn on later):

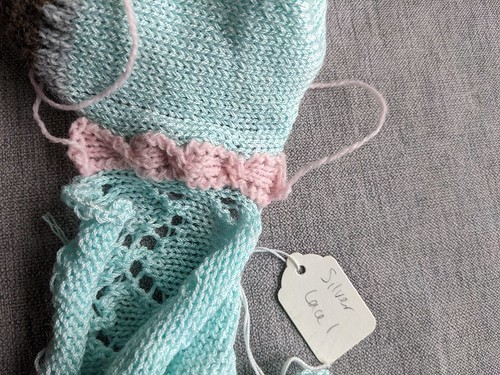
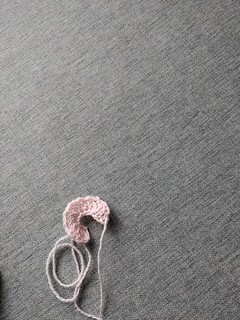
E-wrap cast on 5 stitches or more (adjust to suit taste). Knit two rows. * Transfer end stitch on RHS to its neighbour as if to decrease, but leave the needle in work. Knit 2 rows. Rep from * to desired length. You need to knit A LOT of this! When finished, cast off. Using the latch tool, latch up the edge loops created by the decreased stitch, this will make the knitted strip curl into a ruffle. One to try and see if you like it. 

PXL_20240413_151926709

Thursday, April 22, 2021

Easy double-bed Passap cast off

I found this in Carmen Reuter's notes, and Sheila West very kindly posted a video of this on Facebook. I thought it was worth sharing because it's really easy to do. No more casting off by hand for me!

First, transfer all the stitches to the back bed, and knit 1 row right to left at ss 8/8

PXL_20210417_162056748

Drop the front bed. Using the yellow latch tool, pick up the first loop on the right and put it behind the latch. Pick up the new loop from the front bed, and pull it through.

PXL_20210417_162131993.MP

Continue in this manner across the whole bed, until all stitches are cast off. Pull the last loop through and take off the machine.

PXL_20210417_162245945

It's worth practicing this on a swatch - I went straight in there and did it on black yarn for my first time, nothing like going straight for the deep end!

Current mood: working

Thursday, March 18, 2021

Using the knitting machine to join garments

Having a "staycation" this week. It was probably a daft idea to take a week's leave when only essential shops are open - I had to time it to match the Cog's contract ending - but we've had some nice walks out in the parks in Warwick and Leamington Spa. It's a pity the weather's not a bit nicer, but we have had fun visiting local farm shops and bringing nice food home. When all else is closed, food tourism is all there is!

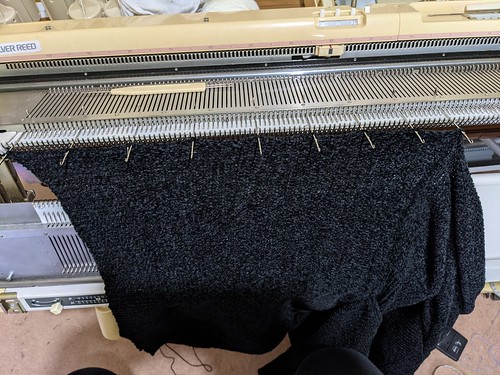
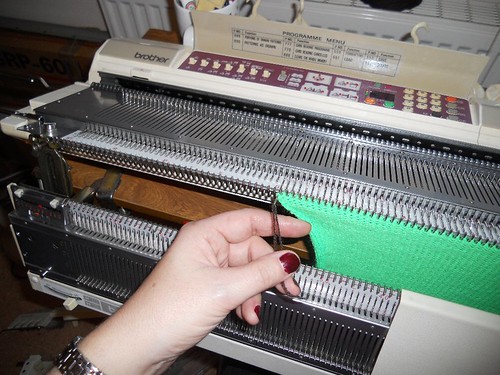
Anyway, I thought I'd share how I have recently used my knitting machine to join a garment. It's knitted all in black, and after an abortive attempt I realised I couldn't face trying to hand sew it. So I used the Passap machine to join the neckband pieces (as the garment was knitted on the passap), and the SK840 to join the remaining seams. You could also use a device such as the Hague linker for this, which would be quicker. I sold mine a while ago as I was not really using it. I use this method for hanging neckbands also. This is done by knitting the ribbing, transferring to the main bed and knitting one row, and then hanging the garment onto the needles in use. 

Using the knitting machine to join garment pieces aka I can't face hand-sewing this! :)

Preparation: Place the carriage on the right hand side of the machine bed (if you are left handed, put it on the left side of the bed).

PXL_20210317_102346707

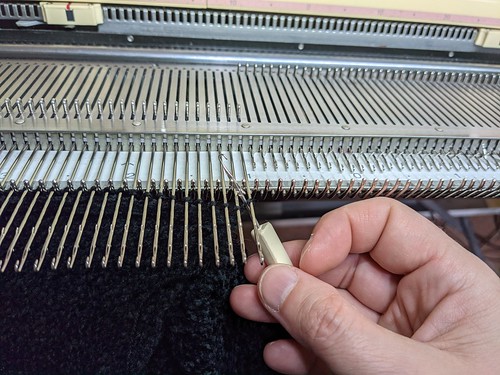
Hold the knitting, right side facing you, slightly stretched against the knitting machine. Use the 2 prong tool to hang the end stitches at both ends, and use the single prong to hang the work in the middle. Make a note of what needle width you used so that you can use the same width for the other half of the garment. I like mine to divide by 10 because it's easier to remember. You can start from either end of the machine and don't have to concern yourself about centring the knitting on the machine.

PXL_20210317_101010993

Continue to divide the knitting across the needle bed by dividing up the space and pulling a needle through the knitting - try to aim for at least two threads on every needle, and try not to split the yarn.

PXL_20210317_101359246

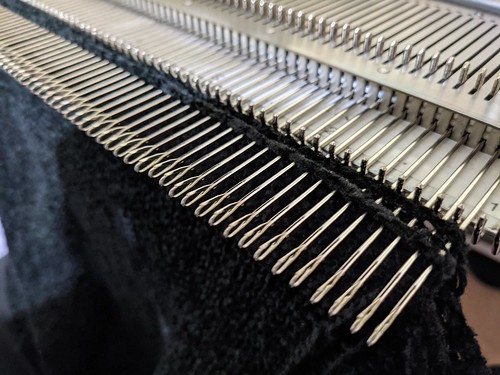
Carry on until all needles are out, then use the ruler to push the needles back about 1 cm.

PXL_20210317_101741585

Hang the second garment piece, wrong side facing you, in the same manner. Be sure to match any details eg ribbed cuffs. When this is complete, use the ruler to close all the latches - failure to do so could damage needles and cause jams, especially when joining side seams.

PXL_20210317_103050701

Thread the carriage. Using maximum tension, slowly knit one row. Pull the needles fully out (keeping the knitting against the gatepegs) and cast off the stitches using the latch tool. Complete the rest of the seams in the same manner, and weave in the ends. 

Current mood: hungry

Sunday, September 23, 2018

Useful casts offs for machine knitting

I realised I never did a companion post to the useful cast ons post and thought I would rectify it. If you are left-handed, swap left for right and vice versa. Better late than never!

Gate peg cast off 1

  1. Transfer rightmost stitch to its neighbour, passing it BEHIND the gatepeg.
  2. Manually knit back with free yarn
  3. Repeat 1 and 2 to end; break yarn and pull through last loop
Gate peg cast off 2


  1. Transfer rightmost stitch to its neighbour, passing it IN FRONT of the gatepeg.
  2. Manually knit back with free yarn
  3. Repeat 1 and 2 to end; break yarn and pull through last loop
"Smiles and frowns" cast off

  1. Transfer rightmost stitch to its neighbour, passing it BEHIND the gatepeg.
  2. Manually knit back with free yarn
  3. Transfer rightmost stitch to its neighbour, passing it IN FRONT of the gatepeg.
  4. Manually knit back with free yarn
  5. Repeat 1 - 4 to end; break yarn and pull through last loop
Loose gatepeg cast off (suitable for neckline cast off)

  1. Transfer rightmost stitch to its neighbour, passing it BEHIND the gatepeg.
  2. Wind the yarn once before the latch and once in the needle latch.
  3. Manually knit back with free yarn
  4. Repeat 1 - 3 to end; break yarn and pull through last loop
Latch tool cast off
  1. Knit last row from right to left at maximum stitch size (eg T10). 
  2. Pull all needles fully forward whilst holding the knitting against the machine
  3. Using latch tool, slip the rightmost stitch onto the tool and slide it below the latch
  4. Insert the head of the latch tool into the next stitch; slide the needle to A position and latch the stitch through.
  5. Repeat 3-4 to end; break yarn and pull through last loop. 
Sewn cast off
  1. Finish with carriage at right, measure 3 times the width of the knitting with the free yarn and break it off.
  2. Thread a yarn needle or double-eyed bodkin with yarn. Pull all needles fully forward, holding knitting against machine.
  3. Thread yarn through rightmost two stitches, slide rightmost needle to A position.
  4. Repeat 3 until all stitches are cast off; pull yarn through remaining stitch.

Wednesday, August 15, 2018

Magic fairisle

I was looking through some 80s MK magazines - I inherited someone's lifetime collection, most of which is currently gathering dust in my attic - and came across the "magic fairisle" technique beloved of anyone with a simple plastic or non-patterning machine. So I thought I'd have a quick go at it on the SK840.

The premise is, you have a length of the contrast yarn. When you get to where you want to knit that yarn, you knit it manually back to A or non-working position, then knit a row with the main yarn. Pull the stitch back to size, knit the next stitch (or stitches) back to A with contrast, knit across, repeat until you are done. For some reason not explained in the original article, they knit two rows, so the contrast stitch is two rows high - I don't know why that is necessary! This produces a lovely effect and would be great for small areas of lines. Wouldn't work so well for blocks of colour though as it's hard to match the tension.

It's quite a nice embossed effect on the purl side, too! Because the contrast yarn is added manually you only get small floats with the main yarn.

IMG_20180815_080537

IMG_20180815_080544

Current mood: thoughtful

Thursday, May 05, 2016

The art of lace on a knitting machine

I was asked to give a talk on lace in a machine knitting context at short notice last week, and had to think of something to talk about that hadn't been done before, as they are all old hands at machine knitting and I'm actually the new kid on the block. So I thought I'd talk about some of the different kinds of lace that can be created on a knitting machine. These are my notes - I'm sure there are further variations (today's Knit it Now has "lifted lace"). Just shows you that these machines are far more versatile than people think. 
  • Two types of automated lace – two carriage or one carriage systems ie Brother/Toyota versus Silver/Knitmaster 
  • Some machines can't do lace at all so do not have a lace carriage. This is due to inflexible needles (eg older machines, mid-gauge and bulky machines), or plastic bed machines (e.g. passap) – but there are other ways to achieve a lacy look e.g.
    • Needles OOW (aka NOOW (new) lace, with thanks to Tony Bennett!)
    • Hand manipulation on one or both beds
    • Use of thick and thin yarns (punch/thread lace)
    • Creating “sacrificial” stitches and then dropping them
    • Holding position with NOOW
    • Also, a combination of two techniques is possible on the two carriage systems, e.g. lace + knitweave etc.
  • Think about using lifelines if you've done a lot of work (double this if you're using the ribber bed). Far less hassle to add in a lifeline than to try and fix a dropped stitch. 
  • Think about yarn choice - automatic lace is better with a slightly stretchy yarn so linen and cotton aren't an easy choice for the beginner
  • Think about weights - lace sometimes needs lots of weight, and if you have "woolly weights" (magnetic) lace is perfect for that, no pesky claws pulling on your knitting.
  • 90 deg rule - according to some manuals you're best to have the work hanging at 90 degrees from the main bed, so draped over the out of work ribber (cover it with a pillowcase or something similar). Some machines work just fine with the knitting hanging straight down, though - so don't forget to sample and check your machine's preference. 
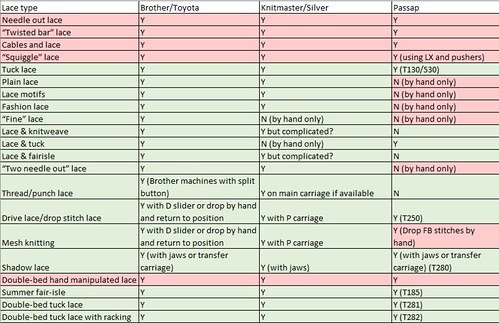
I came up with a chart (see below) about what's possible on what machines, I'm not quite sure it's 100% correct though, so feel free to comment. 

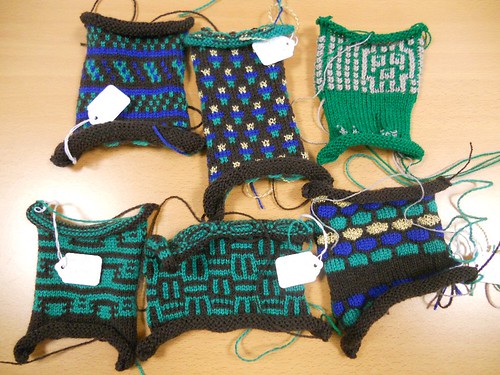
I've added some pictures at the bottom of some samples I have. I don't have all of them sampled as yet. The shadow lace ones were actually done in college. I do have a sample of biasing lace but it's too small to show the actual effect. Ellen Turner made lots of zigzag strips of it and then sewed one of them into a circle, and then more around it, and made a lovely tablecloth with them. Alas, I don't seem to have a picture of it - must have been before I had a digital camera. 

Lace types

Hand-manipulated lace

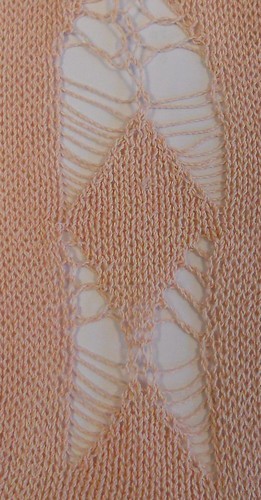
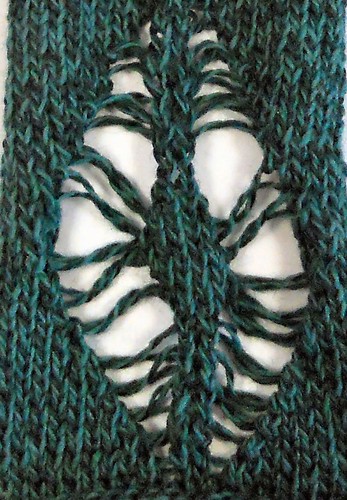
  • Needle out lace - decreases and needles taken out of work and put back in again - creates long floats, so do not use where floats will be an issue. Thanks to Bill King for this one!
  • “Twisted bar” lace - adding an empty needle in twists the bars between out of work needles - this was something Iris Bishop figured out. 
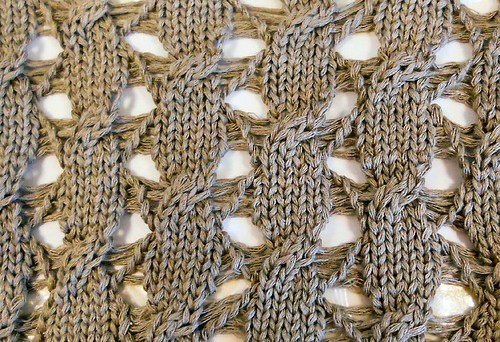
  • Cables and lace - as above, with cabling added
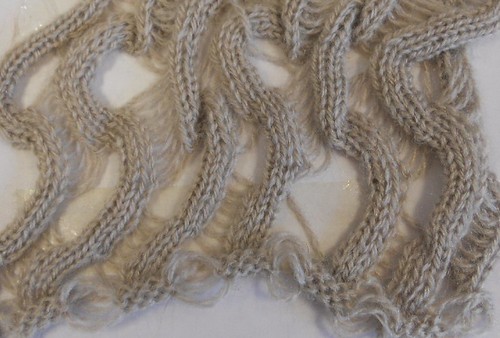
  • “Squiggle” lace - use holding position over groups of needles in work, and knit back and forth over two groups, gradually working across the bed and back again. 

Lace without a lace carriage

  • Tuck lace - needles out of work and tucking on the main bed - cancel end needle selection if your machine has it. 
  • Thread lace - this is a variation on fairisle, ie a thick and thin yarn are used. The thin yarn knits alone in some areas, and both yarns knit together in the other areas. Only certain machines have this capability.

    Lace with a lace carriage

    • Plain lace
    • Lace motifs - using cams or programming to isolate parts of the pattern
    • Fashion lace - moving stitches over in several passes so that the columns of stitches appear to bend
    • “Fine” lace (Brother only) - transfers the selected stitch so as to share it between its original needle and its neighbour; produces a textured effect
    • “Biasing” lace - continually transferring in the same direction over every other needle forces the material to bias
    • Lace and knitweave - you can mix rows of knitweave and lace
    • Lace and tuck
    • Lace and fair-isle
    • “Two needle out” lace - a variation on plain lace, you can actually have two needles out of work for a while to create a mesh effect - with thanks to Beryl Jarvis who discovered this. 
    • Thread lace aka punch lace - a variation on fairisle, this is achieved with thick and thin yarns instead. Some areas both yarns are knitted, and some areas only the thin yarn is used.

      Double-bed “lace”

      • Drive lace (all needles knit every row on RB, patterning Ns on MB released to form holes - hand-knit equivalent of double-wrapping certain stitches and dropping them on the next row
      • Mesh knitting – as above, but this time the holes / bigger stitches dominate
      • Shadow lace using jaws or transfer carriage - transferring stitches between beds to make holes
      • Double-bed hand manipulated lace - using the ribber to create ribbed sections mixed with lace
      • “Summer fair-isle” - stitches are created and dropped at the end of knitting the piece (a Passap technique). 
      • Double bed tuck lace - needles out of work, both beds tucking in opposite directions. 
      • Double bed tuck lace with racking - as above, with racking added.


      LACE_TYPES
      Click on this to embiggen - I gave up trying to make Blogger post a sensible table...

      DSCN2346
      Needle-out lace

      DSCN2342
      Twisted bar lace

      DSCN2343
      Cables and lace

      DSCN2349
      Squiggle lace

      DSCN2345
      tucklace1
      Tuck lace examples

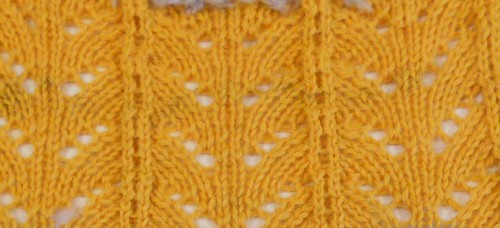
      plainlace
      Plain lace

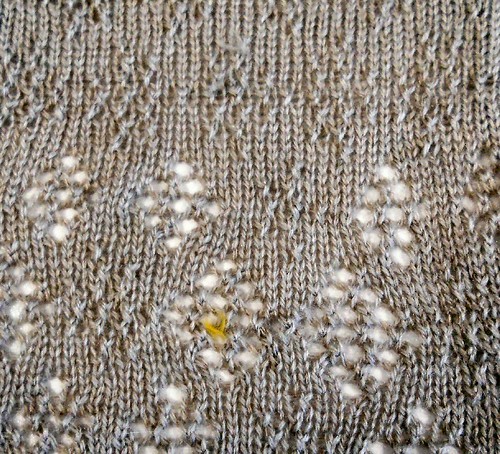
      DSCN2341
      Lace motifs

      DSCN2339
      Fashion lace

      DSCN2338
      Fine lace

      DSCN2348
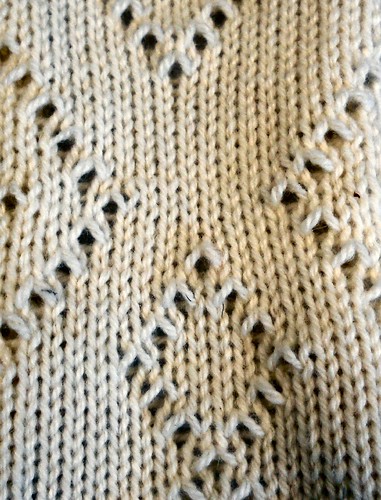
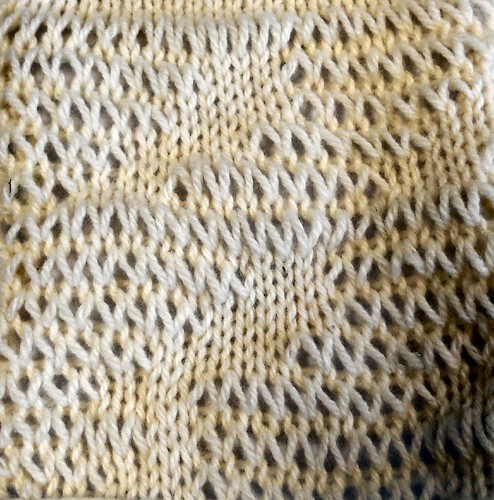
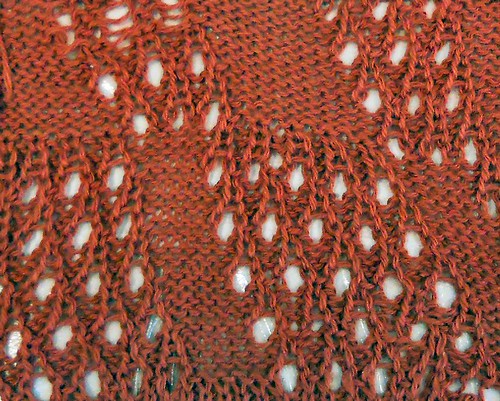
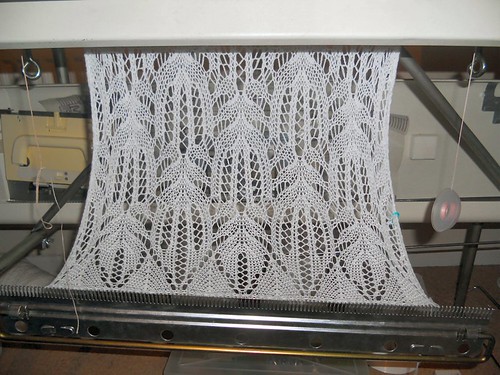
      Lace and knitweave - the weaving yarn very kindly fills in the holes for an interesting two-colour effect. I need to knit a bigger sample of this I think! 

      DSCN2340
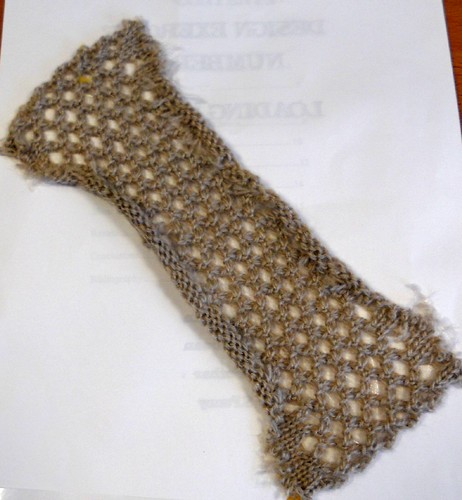
      "Two needle out" lace

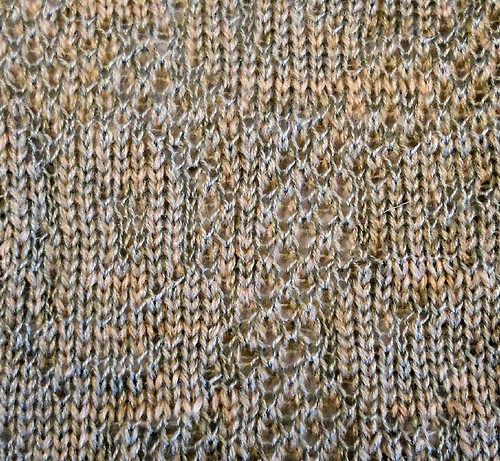
      DSCN2344
      Thread lace

      DSCN2350
      Drive lace

      DSCN2333
      Mesh knitting

      DSCN2334
      DSCN2337
      Shadow lace


      DSCN1435
      Double-bed hand-manipulated lace in progress


      Double-bed tuck lace

      Saturday, February 13, 2016

      Using modified double bed jacquard to control floats in a design

      When the knitting machine manuals talk about double-bed jacquard, it's always full needle rib, which tends to mean finer yarns. The more colours you use, the thinner the yarns have to be - 4 colours requires 4 ends of 1ply - otherwise the knitting will be so stiff it won't knit off correctly. But there's a technique using only limited needles on the ribber bed, which allows you to convert fairisle designs with lots of floats into designs backed with a contrast yarn web - ideal for keeping fingers away from floats and damaging the knitting. Because you're using a lot less needles on the ribber bed, 4 ply yarns can be used, and the resulting tension is very similar to stocking stitch. I've seen it described briefly in "The Machine Knitter's Design Book" (Hazel Pope), and with a diagram in "Machine Knitter's Guide to Creating Fabrics" (Weissman, Lewis). It's something that's been on my "must-try" list for ages. Of course, doing it when I am pushed for time only ended up in a lot of knitting hitting the floor, and dbj being what it is, it's easier to start again.

      The principle is this - you have all needles in work on the main bed, but only certain needles on the ribber bed - every 4th needle, perhaps. The ribber needles knit up the floats, and keep them under control. Because you are only knitting a few needles on the ribber bed, you can use your 4ply yarns and the tension is pretty much the same as for standard fairisle/stocking stitch, so you can use this for small areas of patterning on a plain sweater. You tend to get faint lines on the public side of the garment - if you are knitting a pattern with lots of verticals you can place these in such as way as to emphasise the verticals.

      These instructions are for Brother electronic machines, but it would work on other machines I'm sure. Punchcard machine owners will have to repunch the pattern card for DBJ.

      Method:
      1. Get some stocking stitch established on the machine (MT=8), and end with the carriage on the far left (on the rails, beyond the turn mark). Replace the sinker plate for the ribber arm connector and ribber carriage. Set ribber to slip in both directions, and set to half pitch.
      2. Install the colour changer. Set the machine to KRC not KH so it will convert the pattern to double bed jacquard.  Load your pattern. Press the orange button, this will show you which yarn feeder you should be using. Install the contrast yarn in feeder 2
      3. Set the carriage to KC1 (3pm) (end needle selection ON) and knit one row in main yarn (MY), COR
      4. Push both part buttons in, and knit back to the right.
      5. Select contrast yarn (CY) and set ribber to knit both directions, RT = 4
      6. Put every 4th needle on the ribber into work (ribber must be at half pitch) - when selecting needles, it's best to work outwards from the centre, and ideally you also want a ribber needle near both ends of the piece; knit 1 row carefully, hang ribber comb and weights, knit 1 row
      7. Select MY and set ribber to slip in both directions, knit 2 rows
      8. Select CY and set ribber to knit both directions, knit 2 rows
      9. Repeat rows 7 & 8 until pattern is completed. Use the 7 hangers as necessary to maintain the weight on the ribber stitches. 
      10. Hang ribber stitches onto corresponding main bed needles, ensuring that they stay IN FRONT of the main yarn stitch so that they do not show through on the front. Drop the ribber bed and replace the sinker plate for stocking stitch and carry on with main yarn only. 
      Notes: 
      1. I always changed colour and THEN changed the ribber settings - so background, both switches up, knit 2 rows, contrast, both switches down, knit 2 rows. 
      2. KCii works ok for balanced fairisle patterns, but on my machine it would immediately strip the knitting off (from the right hand side) for patterns with large areas of colours. Also, the mesh backing is only attached at the colour changer end, so you would have to catch the right hand side in somehow when making up the garment. KCi works for all patterns so is the preferred "safe" option, plus end needle selection ensures that the mesh is attached at both ends. 
      3. You might find adding the fine knit bar helps. I'm not sure about the end stitch presser plates. 
      4. Knit dbj fairly slowly - you're asking the machine to do a LOT of work, and going too fast will result in errors in the patterning. When I stopped and visually checked every row, the needle selection was perfect. 
      5. The ribber should be set to a higher tension than the main bed - I ended up using T8 on the main and T3 on the ribber bed. It's also worth washing your swatches, because washing revealed some rather unsightly ladders when I was too loose on the ribber. In other words, the knitting had a kind of ribbed effect where the contrast yarn peeked through the knitting in stripes. 
      6. I tried hanging the heels of the previous main yarn row on the ribber, and then had to frog back and rehang after a mistake, and ended up with a neat row of holes in my knitting, hence my suggestion that you allow the machine to create the first row of ribber stitches in the contrast yarn. It might just have been that I should have frogged back another two rows and re-knitted them.
      7. Another tip - it can be a pain to keep having to restart your knitting when it goes wrong, so consider threading a lifeline through your knitting a few rows before starting this technique. I thread my double-eyed bodkin with ravel cord and thread it through every live stitch on the machine, and then use a clothes peg to peg it out of the way. It can be pulled out later with no effect on the knitting. 
      8. DBJ patterns containing solid lines of colour won't work - there's not enough weight on the ribber and it tends to strip off the machine. So avoid solid lines of one colour in your designs. 
      Now, this isn't quite the method given in the books. I would have preferred to use that method, because you can keep the ribber set permanently to knit one way, slip the other and you can just concentrate on changing colours every two rows. Every time I tried it, the knitting would strip from the machine from the right hand end. I'm going to have to work on it. It's in the two published books I mentioned above, with pictures of the back - you get ladders where the colours alternate, 1 row black, 1 row white. It's also an industrial technique I've seen on the insides of many supermarket sweaters. So it must be possible - I just haven't quite figured it out yet. My technique gives you a mesh backing made from the contrast yarn only, which keeps the floats under control.

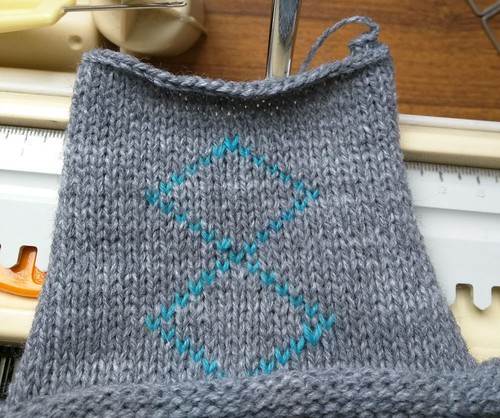
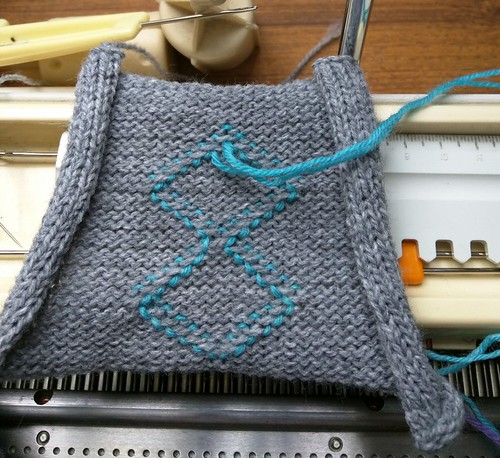
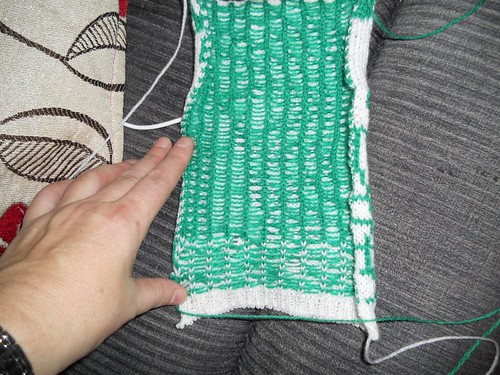
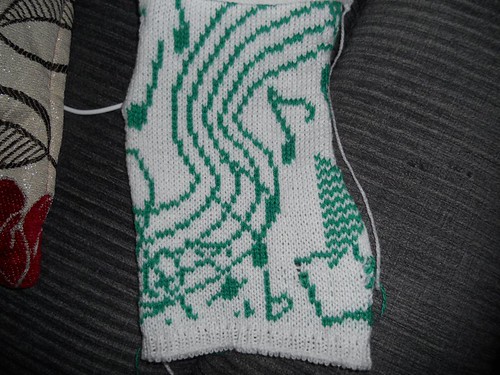
      You can see I tried both methods on the swatch below - it's a pre-programmed stitchworld pattern that is unsuitable for fairisle as-is, due to the large areas of white:

      Picture 210

      If you look at the right side, you can see small ladders in the first few rows (using the alternate colour backing technique). Using the method detailed above seems to remove these ladders.

      Picture 209


      Wednesday, December 09, 2015

      Tips for motif knitting, single bed colour changer

      I'm in an unseasonably jolly mood (finally starting to sleep better after 3 months of foreshortened sleep). Strange dream about deciding to stop my "new" car and check out the engine - the bonnet lever (inside the car) turns out to be almost exactly where I dreamt it was (looked it up this morning - only got the car 10 days ago). Bloke behind me in the dream was a bit peeved I just pulled over in front of him. That's all I can remember, but it's the first snatch of something I've remembered for weeks so it's quite an achievement that I managed to switch my brain off enough to stay asleep long enough to dream!

      Apologies for still not posting about DBJ/ladder back fairisle technique - the post is written but needs some editing. As I've not much to show, and no project I can share right now - the xmas media blackout - I thought I'd quickly share some pics of a recent workshop using the double bed colour changer, and some little tips for machine knitting motifs instead.

      Picture 012

      Various kinds of two-colour and four colour tuck and slip, worked using the KHC800 single bed colour changer. The skull is a card I worked out at a previous Dream Week with Beryl Jarvis. I took the card to the demo, expecting to replicate one of the other patterns which are all pre-programmed into the KH950i, only to discover the chairman had changed handbags and left the keys at home. So we knitted the skull card instead! When using the colour changers, it's VERY important to start at the right end when starting the pattern, otherwise it won't come out correctly. Check your manual to be sure!

      Picture 043

      On very long pieces of work that need to be seamed, hang a contrast thread at each end of the row - every 50 rows or so. That way, when sewing up, you can stay "in synch".

      Picture 044

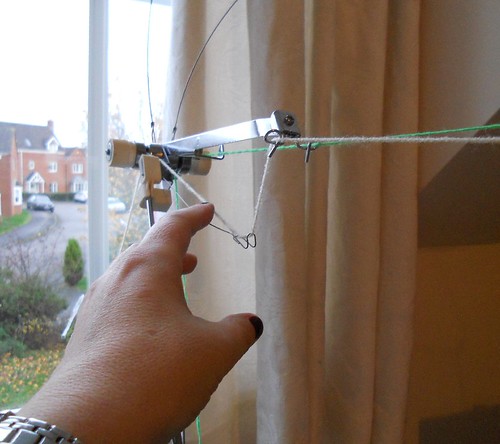
      My KH881 manual pictures this wire but makes no further mention of it - so I used it to add extra tension to the yellow yarn, which is knitting a motif on a green background. It seemed to help eliminate end loops (a bit - not perfect!).

      Picture 046

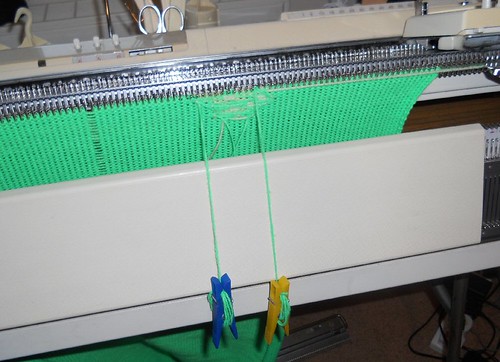
      Someone on Ravelry suggested using clothes pegs as intarsia bobbins, and I can confirm it also works well for the "binding yarn" required in motif knitting.

      Picture 048

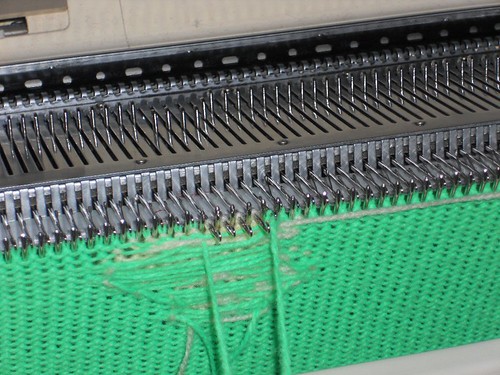
      Using the green to bind in the yellow on the carriage side. Otherwise, the motif isn't properly attached to the knitting and you get unsightly edges.

      You'll have to wait a few weeks to see the finished project as it's a gift for someone. It's still in the sewing up phase too! :)

      Current mood: happy