
Part 1 is short-rowing on one side only. This can be used for smooth shoulder shaping (ie no casting-off jaggedness), sideways-knit skirt shaping, mitred corners etc.
Abbreviations: COL=Carriage On Left, COR=Carriage On Right
1. Cast on the number of stitches you require. I decided to cast on 25 sts, and short row 5 times, ie 5 stitches lost every 2 rows. I actually cast on 26 by mistake - sorry about that, coffee not kicked in yet!
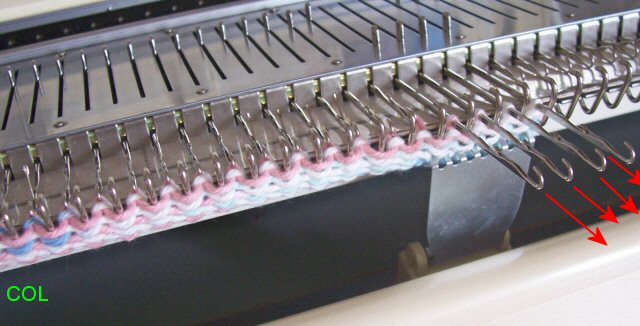
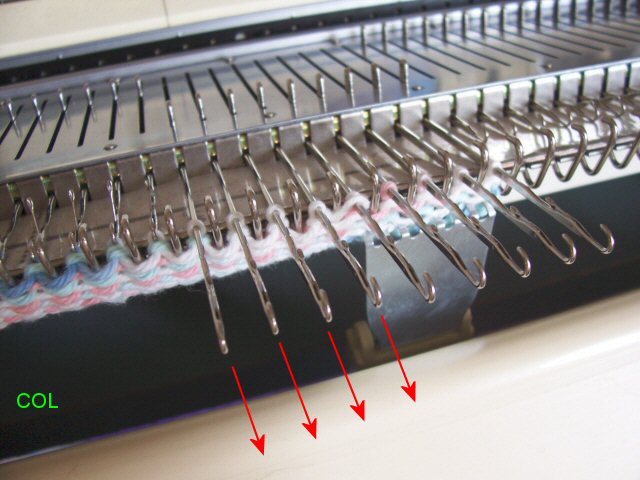
2. With COL and carriage set to HOLD, move 4 needles, on the OPPOSITE side from the carriage, fully out as indicated by the arrows. This is E or D position on your machine. Knit 1 row.
3. Your work should now look like this, with the yarn on top of the held needles.
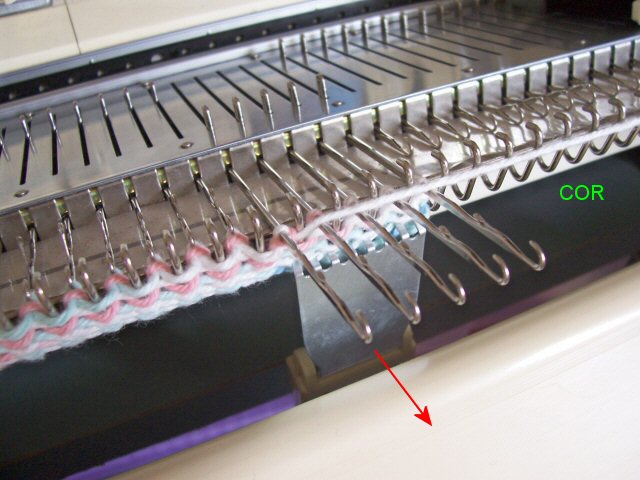
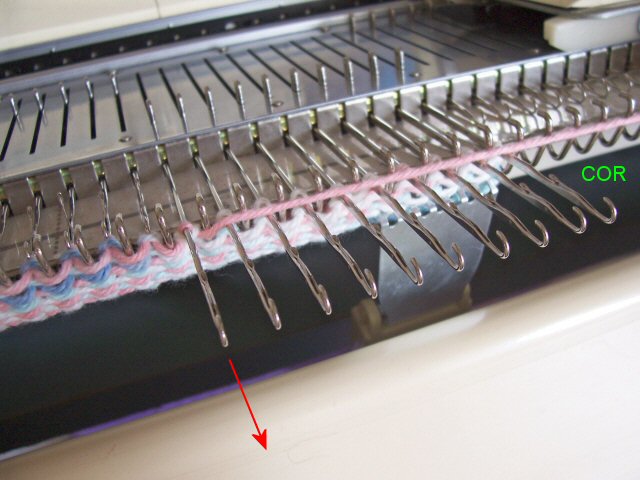
4. Pull the next working needle NEAREST the carriage fully forward. Knit 1 row.

5. Your work should now look like this. Notice that the fifth needle has a little "wrap" of yarn around it. This is called automatic wrapping - it prevents a hole forming, and makes your shortrowing almost invisible. You can manually flick the yarn under the needle instead if you prefer, but this is quicker.
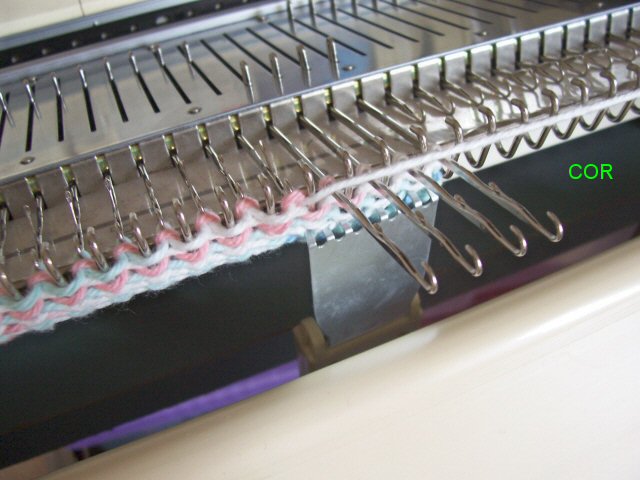
6. Now put the next 4 working needles FURTHEST from the carriage, into HOLD. Knit 1 row.
7. Pull the next working needle NEAREST the carriage fully forward. Knit 1 row.

8. Your work should now look like this. Notice, again, a little "wrap" on the needle you just put into hold.
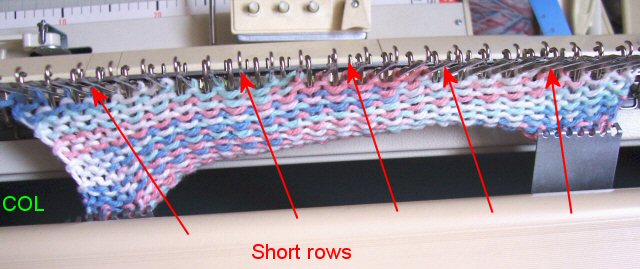
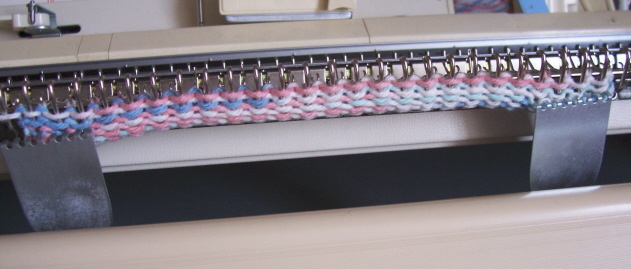
9. Continue with steps 6 and 7 until you have everything in HOLD and nothing knitting. Cancel HOLD, and knit one row. This puts everything back to work, and knits in all the wraps. Notice the work is wedge-shaped, and that the left side is longer than the right side.
If this was a shoulder, you would now cast off at this point. If this was a skirt, you would continue in pattern until the next short-rows were required. If you wanted to make a circle, you would start the technique again, from the same side.
To turn a 45 degree corner, you must put one needle into HOLD every 2 rows. Suzy has done a video about mitred blanket squares here
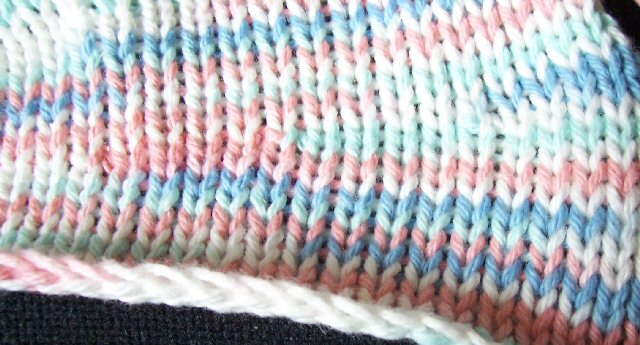
10. Finished short-rowing, from the right side. I deliberately used a variegated yarn, so that you can see the short rows - obviously, in a single colour, this would be invisible.
I will upload part 2 later, which is short-rowing on both sides for sock toes, etc.
6 comments:
Thank you Jane! This is SO useful. I wonder what yarn it is you're using here...
I'm fairly new to MK, as I am a handknitter. Am I to understand that you don't pick up the wraps for short rows, like you would for handknitting? I'm making the lizard ridge by hand and have to remember to pick up each wrap as they pass. Thanks for your help.
Thank you so much for this
I have done back of waistcoat
cast off method, when I do the fronts I will use this,
Judith
Can you post a tut on shortrows in the middle of a row?? That boggles my mind. thanks!!
Thanks for such a detailed description of this technique-I always ended up in such a muddle that I thought I would never be able to do it-now I have hope once more LOL.
Hi,
How can I contact you.
Kind regards,
Cris
Post a Comment