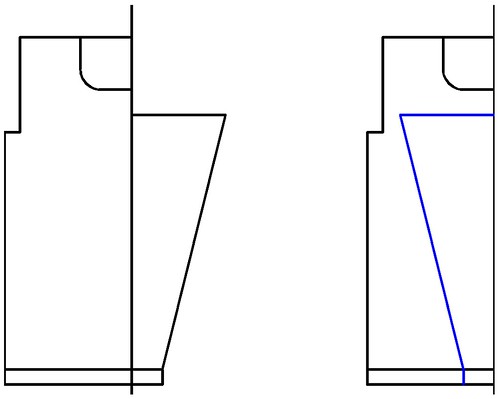
Don't complicate matters - this is all you need to draw on your knitleader sheet. Half a front/back and half a sleeve. The left design is for knitleaders that centre at 0, and the right is for devices that have 0 on the right (sleeve is in blue).
Obviously, this only works for symmetrical pieces - if you are making a ballet wrap then you would need to draw the whole piece, and then make one piece as drawn, and one piece reversing the shapings.
For knitleader read knitradar, knitracer or knit contour. Same device, different manufacturers.
You set the stitch scale to match your tension swatch (usually a cardboard or plastic ruler slotted into the front of the device) and your row scale to match your tension swatch (this will be a knob of some sort, that controls how fast the pattern sheet moves per row). Then you just follow the lines as they cross the ruler. Couldn't be easier!
I get schematics from old machine knitting magazines and modify them. You can also set the row and stitch gauge to match a handknitting pattern, air knit (ie with no yarn/needles in work) following the pattern, and add dots onto a blank sheet as you go. When you're done, join up the dots, and voila, you've converted the handknit pattern into a schematic you can use with your knitting machine.
You can also draw an intarsia design on the sheet, and use it to remind you where to change the colours - easier than trying to follow a graph.

1 comment:
Such a great suggestion ~ which I'm not sure I'd of ever thought of ~ to convert a handknit pattern using the knitleader .... this will make things so much easier. Many thanks Claire
Post a Comment