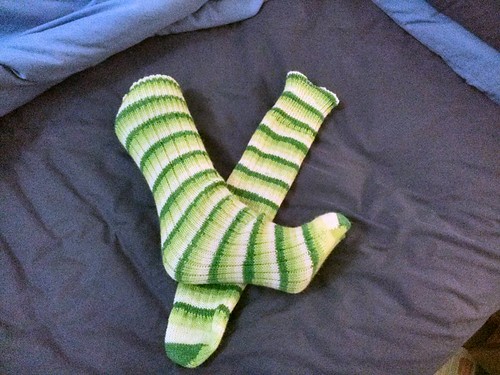
This is only a very loose "pattern" as such - feel free to improvise! Short version is below. These socks are ideal as they have no heel so one size fits all. This is based on MarytheKnit's heelless sock pattern - credit to her for developing this pattern (you will need to be in Ravelry to read that, there's a little history of the sock). Mary's version has a handknit, conical toe to minimise wear on the sock. My version is worked on a 72/36 combo and a short-row toe is also worked on the machine. I didn't think they'd be very comfortable (with all the extra material at the ankle) but they are surprisingly good to wear. If using a variegated yarn it's a good idea to designate which colour toe you prefer when first wearing them, because over time they will wear in one place.
Long version:
- Cast on in waste yarn (WY) and get knitting established on your CSM.
- Still in WY, remove the cylinder spring and transfer to 1x1 rib and knit a few rounds, stopping at the 3 o'clock hash mark.
- Break WY, tie on main yarn and pull the yarn through the yarn carrier until about 15cm of main yarn (MY) has emerged.
- Engage heel spring, if using
- Holding the yarn loop towards the front of the machine in such a way as to ensure all needles knit off, crank slowly to the 12 o'clock position.
- Using a hook, pull the yarn loop down between the ribber and cylinder so that it is out of the way.
- Crank around to just before the 3 o'clock mark, and disengage the slip lever (so that the ribber does not knit).
- Knit two rounds* carefully (you may need to pull down on the knitting to stop it riding up).
- Re-engage the slip lever, and disengage the heel spring if it is in work. Set row counter to 0.
- Crank 30 rounds 1x1 rib, stopping at the 9 o'clock mark on the last round.
- Starting at 3 o'clock, and working in a counterclockwise direction, transfer the setup to 3x1 or 5x1 rib as desired.
- Crank to R145** in desired rib, stopping at the 9 o'clock mark on the last round.
- Starting at 3 o'clock, and working in a counterclockwise direction, transfer any remaining ribber stitches to the cylinder and remove the ribber. Replace the cylinder spring.
- Crank to R150 in stocking stitch (pre-toe) and work your desired toe*** - I tend to do an automatic wrap short row toe.
- Knit at least 12 rounds in WY and go back to step 2 for the other sock.
* Selvedge - you need at least one round here to lock the cast on edge - finer yarns you can go up to 4 rounds.
** Add or subtract more rounds here as desired
*** You can also scrap off here, pulling a large amount of MY between the needles at 3'clock, and handknit the toe later.
Short version:
30 rounds 1x1 rib
Crank to R145** in 3x1 or 5x1 rib
Crank to R150 in stocking stitch
Work desired toe***, scrap off on WY.
Repeat for other sock.

2 comments:
This is Greek to me. I am unfamiliar with some of your terminology and cannot follow this pattern.
I tweaked some of the text, hope that helped.
Post a Comment