100_3707
Originally uploaded by steel breeze

My addiction to anything crafty created with a pointy stick, a needle or a hook.....
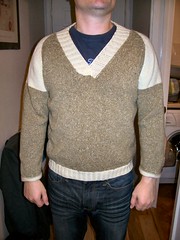
Of course, although loosening the tension (and adding 4 stitches) means that the sock now stretches enough to be put-on-able - it also made it longer. Yes, I need to knock about 12 rows off the length to make a size 7. I asked the Cog to try on the first one - before washing, it measured 28cm, which shrank to 26cm after washing. He tried it on and immediately claimed it (he is a size 9). You could have knocked me down with a feather - this is the man who eschews New Maine jumpers because they have a tiny sailor's wheel logo embroidered on them. This is the man who always wants navy blue or black jumpers, and they are always very, very plain. Not even a cable in sight. They weren't actually intended for him, but I guess it is a success of sorts. I'm loathe to take them off him, put it this way. He's already dropping big hints that he wishes I'd darn some of the socks I've knitted for him in the past, despite the fact that the leftover yarn is long gone. If I darn them, it will be with a primary coloured sock yarn - he said that was ok, but he might not like it when he sees it!
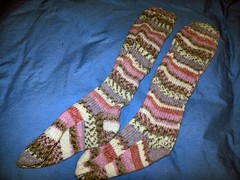
I also finished knitting the second sock (Sirdar Crofter pattern #7). They fit ok and would be great under wellies (if I owned any) or for around the house.
Both of these endeavours required that I remember how to graft (aka Kitchener Stitch) the toes. I used to have a little bookmark somewhere that had the instructions. I copied the instructions from the back of someone's book on knit night, but I was also talking, so the grafting wasn't entirely successful. It also needs very good light, which is only really available at my dining table at home.
Once I recalled Kate of Knit the knit's foolproof Kitchener instructions, and realized that occasionally I was accidentally catching the yarn and making a kind of blanket stitch, I was away. So I present for your information, Kate's foolproof Kitchener stitch principles.
Basically, each stitch to be grafted needs a "catching" stitch and a "finishing" stitch. The "catching" stitch is always worked in the OPPOSITE direction to the stitch being worked. For example, to catch a KNIT stitch, you sew through the stitch PURLWISE, and vice versa. The stitch remains on the needle after the "catching" stitch.
When working the "finishing" stitch, the needle is worked in the SAME direction as the stitch being worked. So a purl stitch is sewn in a purlwise direction, and a knit stitch in a knitwise direction. After each finishing stitch, the worked stitch is dropped off the needle.
So, working from right to left (I am right-handed), work a catching stitch on the purl side, a catching stitch on the knit side, * a finishing stitch on the purl side, drop stitch, a catching stitch on the purl side, a finishing stitch on the knit side, drop stitch, a catching stitch on the knit side, rep from * to end, ensuring both end stitches have both catch and finish stitches worked through them.
I don't know about you, but it's easier to think of it with this system for me. Well, I am easily distracted! :) I will post pictures of the socks as soon as I remember to take some pictures and unload the camera, haha.
I also made a start on a fine gauge knitted tunic. I have a lot of 2ply cornflower blue lambswool on cones - I'd actually call it a slate blue, but the label says cornflower. I tried swatching it on the standard gauge, two ends together, but really didn't like the fabric produced (this could be my over-tightening tendency). The wool didn't bloom in the wash - it felt as if it would make a hard-wearing fabric, but not a particularly nice fabric. So I made swatches on the fine gauge, and it was like some sort of magic - a lovely soft handle, just what you would expect with lambswool.
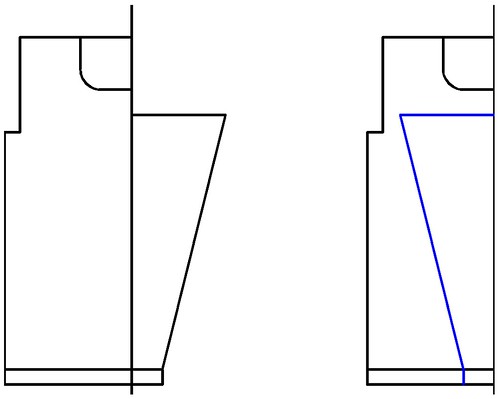
I've designed a simple knee-length tunic using Knitware, it has raglan sleeves and a cowl neck. Yes, you read that right, raglan. This baby has 600 rows. What was I thinking? I managed to get as far as doing one side of the neck, on the front, before I had to stop and give my eyes a rest. The daylight was fading. I will finish it - and to be fair, the front is the most complicated piece - but talk about not doing anything by halves! I probably should have started with something a bit smaller. I probably ought to get a better light in the knitting room, too!
PS Kate - hope you are well! Your blog is looking kind of abandoned these days!
The second attempt I started with a ribbed top, scrapped off half of the sock on waste yarn when I got to the heel, and then knitted heel-sole-toe-top of foot. That one came out ok but needs sewing up.
Around 10pm, I realized I could have ditched the waste yarn and just held one side, thus making a sock with only one side seam. Yeah, I'm not the brightest of sparks, am I?! Serves me right for not planning it better.
My machine SK840 doesn't really like knitting with two ends of 2ply lambswool. I'm pretty sure the Brother could cope with it though. The SK840 just seems a lot tighter, somehow. You want a firm tension for a sock, ideally.
I will try to get playing with some of my redundant tools this Christmas - I've a table loom begging to be warped up too. Too many hobbies, not enough free time.
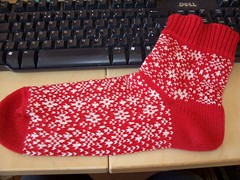
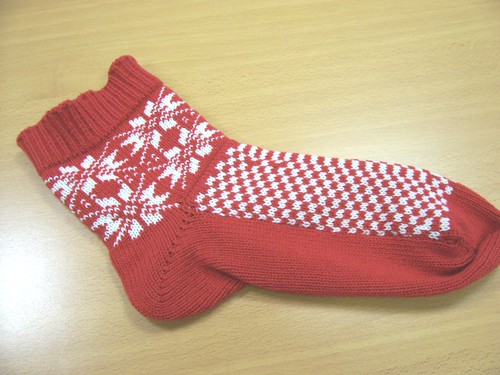
Addendum: finished sock above - needs a few more stitches in the leg area because it's a bit tight, and I need to design a smaller snowflake pattern I think.
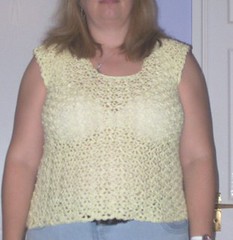
Yeah, not a great picture, but it was 10pm when the photo was taken thus no natural light. Fits like a dream, very smooshy, I love Doris Chan's stuff! This is from "Everyday Crochet" - I want to make more things from this book! :)
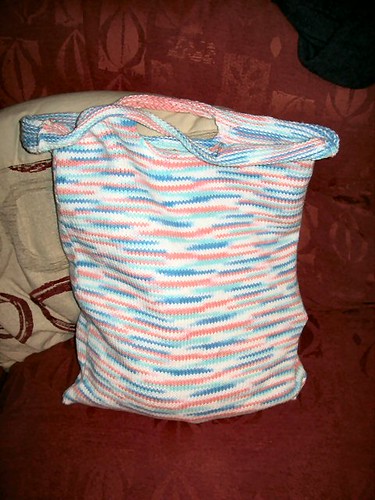
Yarn: Peaches and Cream worsted cotton
Machine: LK150 or 6.5mm machine
Tension: T5
Cast on 80 stitches using the e-wrap cast on (leave an end of about 30cm for sewing up). RC000 Knit 10 rows.
*Set machine to HOLD. Put centre 20 needles into hold, plus the remainder of the needles on the opposite side from the carriage.
Knit 6 rows on the remaining stitches, then put them in hold. Break the yarn.
Put the centre stitches back to working position using the transfer tools, and cast them off with the single transfer tool. Leave the empty needles out of work.
Put the remaining held stitches to upper working position and knit 6 rows, starting and ending in the centre of the machine.
E-wrap cast on over the centre 20 needles, knit across the remaining held stitches.*
Reset row counter to RC18. Knit to R140.
T9 knit 1 row
T5 knit to R265.
Repeat handle section from * to *.
Knit 9 rows T5. Knit 1 row T10, latch tool cast off, leaving a 30cm tail for sewing up.
Sew up both side seams, weave in ends.
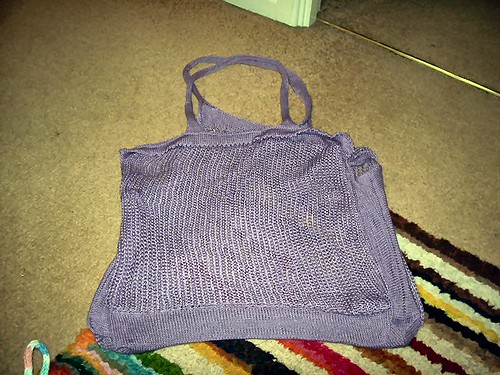
Variation #2:
* Instead of knitting 10 rows before making the handle, cast on in waste yarn, knit 1 row in ravel cord, then 10 rows T5, 1 row T max, 10 rows T5, and pick up the cast on row (ie make a hem). Repeat this for the other side (where it says Knit 9 rows T5).
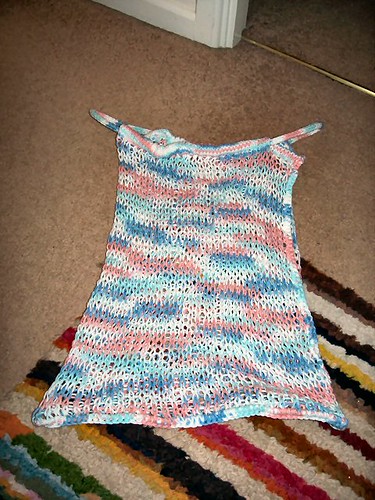
Variation #3:
* Drop stitch variation - cast on 81 stitches instead of 80. After making the handle and resetting to RC18, knit 10 rows. Transfer every other stitch to its neighbour, leaving the empty needles in work. Knit to RC 255, and then drop every other stitch (make sure these are the ones you transferred originally). Knit 10 more rows and complete as before. When off the machine, pull the knitting to drop the stitches completely. You may need to experiment with this and knit less than 255 rows, as dropping stitches will make the knitting expand. (If I get chance I will experiment with this myself).

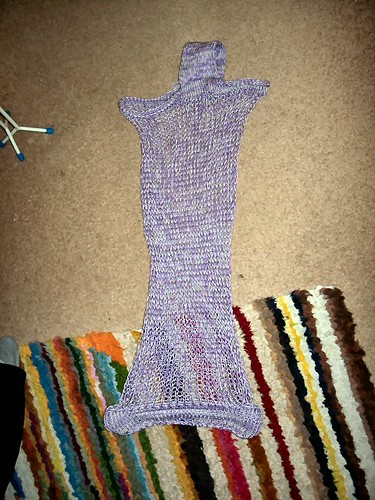
This is with the re-knitted neck. Not great, but looks a lot better than it did...
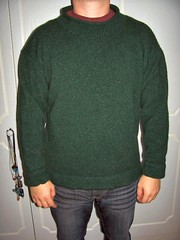
Made on the LK150 from Forsells' Touch of Silk for the Cog. Hems and rolled collar.
The picture is at a funny angle I think - his legs aren't that skinny! :)